Showing posts with label pillow. Show all posts

Thursday, March 10, 2011

Frayed Flower Tutorial

I came up with this idea a few days ago, while I was trying to do something else for a pillow cover that ended up being a total fail. So I went with plan b. I didn't have a plan b so I just started messing around until something came to me, and GLORY! HALLELUJAH! something did.

Start with about 10-15 strips of fabric, folded in half.
I ripped mine because I love the shabby-ness.
Make a small-ish loop, then a bigger one around it.

The strips I did were kinda short, so I would add them
frequently, the loop by itself is an added strip.
Sew sections of loops together to make
them easier to handle. (or glue them)

Keep adding and sewing...
When you feel like you have enough, arrange them
in a flower shape so you really do have as many as
you wanted.
Arrange it to look pretty...
Use one strip and roll it up tight for the center.
Hot glue the center onto your pillow cover fabric, and
then the petals. Make sure to arrange them in even
spacing (if you are OCD like me.)


What wonderful texture this makes!


The end result, I think is fab-tabulous. Right along with my bolster pillow behind it! Here is the link on that tutorial. My husband even said he liked that, so I know it's good!


Linking up to these parties:
Freckled Laundry's Textile Party
Chic on a Shoestring's Flaunt It Friday

Bolster Pillow Tutorial

Ok after a short blogging hiatus, I am back with a cool tutorial to make your own bolster pillow. Don't know what a bolster pillow is? I didn't know either until I just Googled round, long pillow. I am a decorating novice, indeed.
Anyway, I made the pillow out of the drapes I bought from Ikea about a year and a half, I still have the drapes up, but if you have bought something like this from Ikea then you know that you have to trim them to the right length. This was the left-over fabric. The black and white flower fabric is also from Ikea. But don't get me started on Ikea... I used to love the place, but I can't stand it anymore. I always come out with a migraine. Right, back to the original idea of the post...
This makes me happy.


I had to pin and sew two lengths of the fabric together
so it'd be wide enough for my taste.

Make sure to iron your seams flat!
I cut out 2 circles of the flowered fabric and pinned them
one, as you can see, you'll have to fold over some of
the slack in the main fabric, or you'll end up with a giant
hole in the sides, with stuffing leaking out.
After sewing your ends on, stuff with polyfill or whatever
you choose... (Lavender sachets would be awesome!)
Remember to leave the side open a bit to put your
stuffing in, or you can sew the end on last, whatever
you feel more comfortable with.


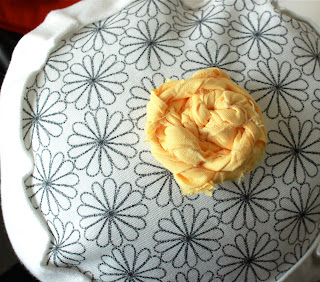
Add a pretty flower or... not it's your choice. (tutorial on
this knotted rose to come!)

I'll show what the rest of my bed looks like tomorrow with another tutorial about my decorative square pillow that is the main attraction of my bed.
Related Posts Plugin for WordPress, Blogger...