Tuesday, April 26, 2011

My Sincere Apologies

I really owe you all an apology. My blogging of late has been non-existant. I've had a lot of things on my plate lately, and frankly the blog just wasn't my number one priority.  My husband is doing finals this week, and my son and I have been very sick. I had family stay over the weekend, it was Easter yesterday, and on Saturday we are leaving for a week-long cruise! So needless to say, I have been running around like a chicken without a head. {Is that imagery disgusting or what?} 
The weekend before last, we went up the canyon to do a photo shoot for my husband's class. While we were there, I snuck away with the camera to capture the wonder of God's beautiful Earth.


Anyway, I hope you can forgive my not-blogging-as-much-as-normal for the next little while, as we will be out of the country, I will try to get a post scheduled to be posted while I am gone. I will be posting a really cool recipe for making your own laundry soap and cleaner that has seriously saved my family tons of money, {and it's green, too!}  I hope that you loved these pictures as much as I do, and can find inspiration in your world as well.
Much love! 
Linking to: Whatever You Want Wednesdsay

Tuesday, April 12, 2011

Vintage-Inspired Pennant Banner

Hello, Lovlies! I hope you are all doing well this morning. I was awoken this morning at 5:30 to the sound of birds chirping! The first time this year! So, this post is very appropriate, because it is all about Spring! Spring is my favorite time of year, the trees are just now starting to bud, the grass is getting more and more green every day!

This is what this tutorial is for, isn't it stunning!?
I think so!
Step 1: Make your template. I just used a plain piece
of paper, folded in one inch on both sides, and cut out
a triangle on the bottom. Place your template over your
fabric, and make the cut (cut two if your fabric is thin)!
{FYI, I used the cheapest white muslin available}

Sew, sew, sew! This is an EXTREMELY easy sewing
project, it is all straight lines. I wanted the vintage-y look
so I didn't particularly care if the seams were not straight.
If your fabric is thick enough to not use two pieces, you
don't have to sew (obviously) but, you may want to,
it adds a little somethin' somethin' to it, ya know?


{I tea dyed my fabric in between these steps, and I was
too excited to even remember to take pictures. I used an
herbal tea, the flavor was Wild Berry, it gave the muslin
a slightly pink tint. Which at first I didn't like, but in the end
I thought it was great, and went well with my Spring theme}

I tried printing right onto my fabric, but it didn't work.
At all. I was very disappointed, but I found another
thing to use instead. Enter Iron-On T-Shirt Paper! {Tip:
I suggest printing it out on regular paper so you don't
waste your iron on paper. That way you can make sure
your text is the right size, and the right font for you.}
Use your paper according to manufacturer's directions.
They probably all ask for you to mirror your image though.
I used an Exacto knife to cut it out. {If you just cut
around the image, you'll end up with a clear/shiny
border that looks kinda mega tacky.}

Just another check to make sure
this is really what I wanted...

IRON IT ON, BABY!

Take a step back, and admire your labor of love.

I added another element to the pennants. I singed the edges
with a lighter, just enough to give it a faux patina.


I do this a lot. I love to look at what I've done so far, so
here's another pic of me admiring my awesomeness.

LAST STEP: Hot glue your string on to the backs of
your pennants, in your desired spacing. I chose hot glue
because if I should ever desire to move it, I may need to
re-do the spacing, and a dab of hot glue wouldn't be too
hard to remove.


And... hang it up! I am so in love with this project.
This is the one time that it turned out EXACTLY how I
wanted! I am so proud of myself. :}


My wonderful Dad made this shelf for me, he's the greatest.

And, I just love the hardware on it too!
Well, there you have it! Easy-peasy-lemon-squeezy. This is the one area in my house that I am completely happy with. So, let me know what you think!
What projects have you done to help you remember/celebrate Spring or Easter?
I do apologize for the red in the pictures, lighting in a condo isn't always the greatest... I would also LOVE it if you would follow my blog, it makes me so happy to get new friends, and establish new relationships!


Linking to: Anything You Want Wednesday at Free Pretty Things For You
Thrifty Thursdays 
Under $100 Party 
No Minimalist Here
White Wednesday 
Vintage Inspiration Fridays 
Air Your Laundry at Freckled Laundry
Flaunt it Friday at Chic on a Shoestring 
Show and Tell Friday 
Decor to Adore 
Weekend Wrap Up Party @ Tatertots and Jello

Friday, April 8, 2011

Still To Come...

Hello again! I've been working feverishly to get this vintage-inspired project done. It's taken me a few days to get done, since I have only been able to devote time to it when the kids are asleep. Hopefully I'll have it up for you Monday or Tuesday. In the mean-time, you should check out Poppies at Play's Parade of Homes click here to be transported over there. There is so much creativity floating around out there. If only I can hone-in on some of that stuff...
Here are a few other linky parties going on that I think are great.
Chic on a Shoestring's Party
Miss Mustard Seed's Party
and
Common Ground's Vintage Inspiration Party

Have a WONDERFUL weekend!


P.s. Stay tuned for a giveaway in the coming days!

Thursday, April 7, 2011

The Quiet Activity Book

Hello, friends! I made my son a quiet book a while ago. Actually, about 18 months ago. It has just been sitting in a closet because I didn't have the grommets to finish it and make it into a book, rather than pages of muslin fabric. So here it is, almost 2 years later than previously anticipated... drumroll please!
TA-DA! The quiet book. We really struggle with keeping Jude's attention during church, (we sit in a confined pew for one hour) with a VERY active 2 year old, it's quite an accomplishment if he didn't escape from our bench more than 5 times.
I made this book all from ideas in my head, no pattern, no nothing really to go off of, other than my superbly awesome ideas. I did all of this before I had my cutting machine, so all of the shapes and letters were all cut by hand. The "pages" are muslin (I just used the cheapest kind) that is 12" x 12". All of the shapes and letters and anything on the pages is felt. I did a lot of hand sewing, because I frankly really suck with my machine.


The alphabet, obviously.


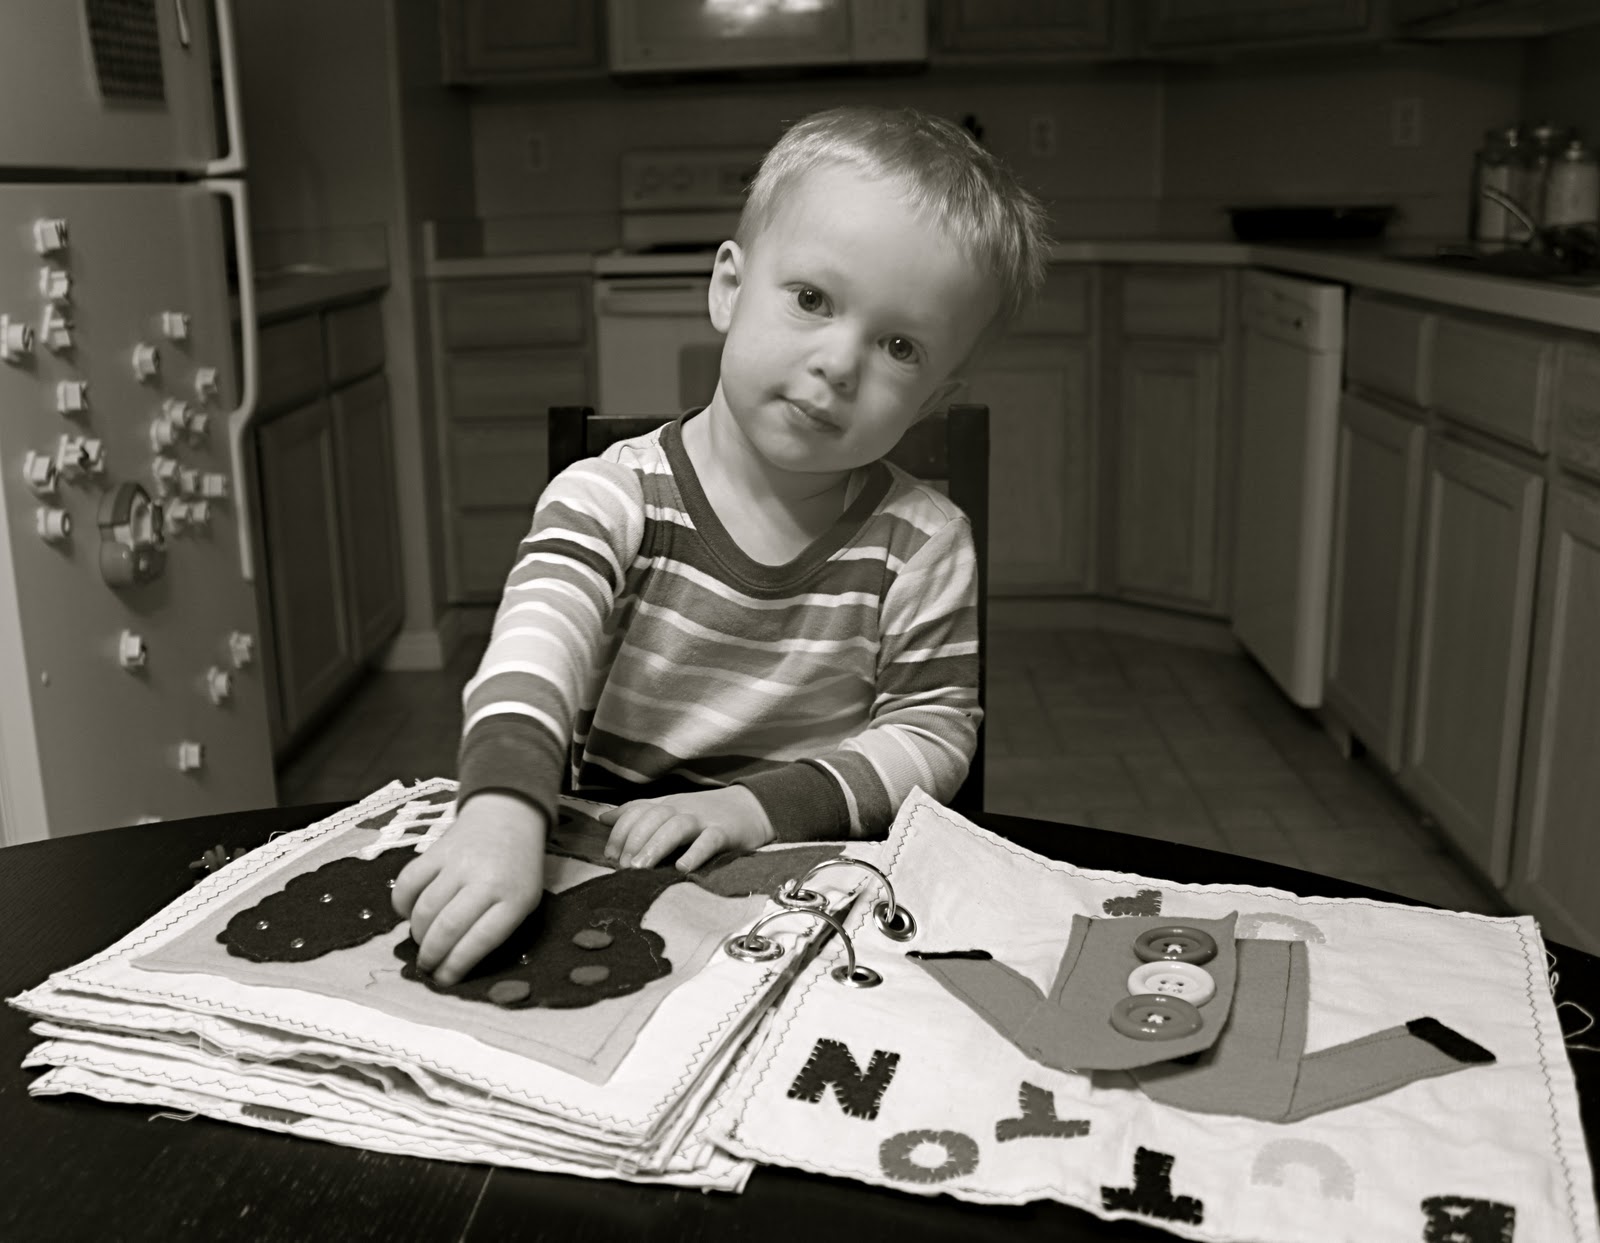
Hopefully this can help him learn
how to button his own coat...


I did the sew-on snaps for everything. I did want the
tearing velcro sound in the middle of a very quiet
Sacrament meeting... I think that sound is annoying.

Learn the colors. I had wanted to do a rainbow,
but then I decided to something a bit more
   original. It took me forever to figure out how to cut
the umbrella pieces.


Shapes, don't look to closely at the sewing I did with
the machine, it's a little skeewompus.

I LOVE LOVE these pages, they are for counting. Each
number has it's own abacus made with a shoestring,
and star beads, can he can slide back and forth as
he counts. It goes to 10, I just didn't take a picture of
the other page.

This is probably Jude's favorite page. He is obsessed
with cars, in all their varieties. 


"The Garage"

The seasons pages, Spring's raindrops are snaps.
Summer sun's ray's are snaps as well.

The leaves, the snowman's hat, nose and buttons can
all come off too.

It does keep him quiet.

Mostly...
All of the pages are my ideas, I own them. If you decide to use them, you may only use them for your personal use. Do not sell them. If you have any questions about how to make your own quiet activity book, feel free to email, or leave a question in the comments. I do read and reply to every one that has an email, or I'll just leave the reply in the comments.

Monday, April 4, 2011

My World


All around you is a beautiful world of inspiration. A little photo editing can be really inspiring. These are images from my town. I know it will make it look very quaint and rustic, but I drove a ways to get these photos. I do live in a small town, however, it is mostly residential. Not many businesses. It is a wonderful place to raise a family. We absolutely love it here.
 As I have said before, here in Utah, Spring hasn't quite sprung yet. Just last week, we were playing outside, (I even got a sunburn!) Only to wake up on Sunday morning to a few inches of snow. The tumultuous Utah Spring has me craving for when Spring really does arrive.
And now, the photos... 

A beautiful view of the wheat field a few miles down
the road

Something about this set up of a water tank, a broken-
down building, and a few hod-podge farm items speaks
to me. Especially with this sepia tone. It makes think of
the Pioneers and what the unsettled territory must have
looked like.

Aren't the mountains beautiful?
All of these photos (along with all of the chippy, broken, worn-in items that are so frequently blogged about) have inspired me to take a new direction with my kitchen. I've got a lot of wonderful ideas up my sleeve, and I can't wait to show them to you all. Keep watching, I've even got a give-away coming up!


What items (or pictures, or just ideas) give you inspiration?
You can share them in the comments, or email to me!!
Related Posts Plugin for WordPress, Blogger...